K40 MINI-GERBIL CARD UPGRADE
I recently bought a K40 Laser from OMTech. Most people use a free software mix for the K40 utilizing Inkscape and K40 Whisperer but there is a far better software solution (not free) called Lightburn. But a stock M2 Nano card will not work with Lightburn. We need to upgrade to an AwesomeTech Mini-Gerbil card.
I liked K40 Whisperer and was getting the hang of it. It’s actually pretty powerful and it really is a good hunk of software but it just isn’t Lightburn. No knock at all on K40 Whisperer intended.
Most K40 lasers come with a control card called an M2Nano which is not compatible with Lightburn. The only way to run Lightburn on a K40 is to purchase a new controller card. There are several options out there but I went with the Mini-Gerbil from AwesomeTech. I just got the card and installed it and as always took notes while doing the installation and ran into a couple of noteworthy things that I thought was worthy of a blog.
There are SO MANY K40 variants that it is hard to say that anything I took note of is a problem.
“Let me just throw this out there…….If you bought a K40 laser and realize you need a new control card and aren’t scared in the least to change it then nothing I note here is above your skill level. I don’t view anything as a mistake or documentation error. There are simply SO MANY K40 variants out there it is tough to cover them all.”
Let’s roll.
First thing you want to do is take a clear photo of the M2 Nano so you can put it back someday if you need to.
The next thing you need to realize is that the M2Nano is mounted to studs on a plate and once you remove the nuts holding the card the studs free fall with no access to the head of the screw. If you don’t want to fight the ridiculous setup I described below then AwesomeTech added 4 adhesive stand off mounts to their kit. Stupid me set them aside thinking they were just wire management standoffs and forgot about them. Would have saved me 20 minutes.
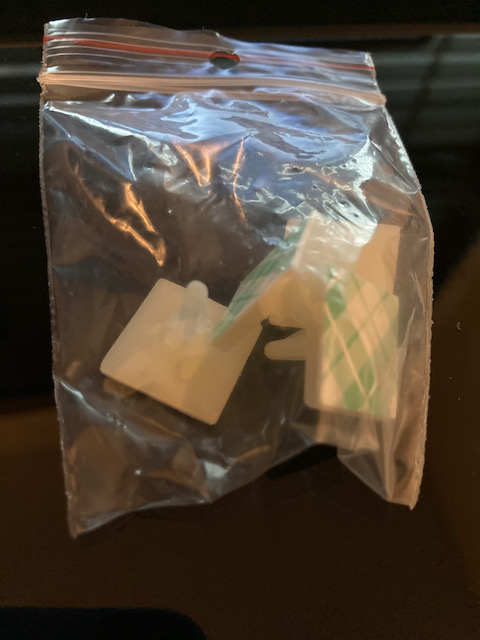
Adhesion standoffs added in Mini-Gerbil kit
Translation: Easy to take apart. A mother to put back together. My K40 has nice wire management with wires tied to standoffs all over the place. For me to remove the plate to get access to the cards and reinstall would have required me to pull up a bunch of wire standoffs. I’m going to say if you have great ergonomics and great lighting then it shouldn’t be an issue. Mine is in a semi dark room at “just bend over enough that it hurts your back and neck height”.
Anyway I pulled the M2Nano card out and began hooking up the Mini-Gerbil. There are 4 plugs and 1 breadboard wire that needs to be added. That’s it. Really simple. The instruction are here and I won’t attempt to replicate them in their entirety. I have the Type 2 power supply variant though.
Just as soon as you pull of the X and Y motor plugs from the M2Nano……..mark at least one of them. The depicted installation drawing shows the yellow wires on X and Y facing the nearest edge of the board and the red wire end being inboard.
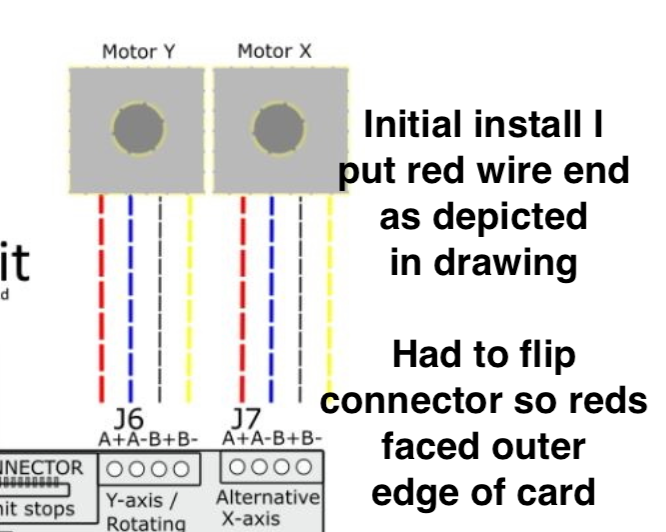
Mini Gerbil X and Y axis connections
Follow Awesome Tech’s instructions. However…….when you set up your printer in Lightburn the home position should be set to “REAR LEFT”. If you turn the printer on and it starts heading for FRONT RIGHT then simply remove the power from the K40 and flip the X and Y connectors. DO NOT PUT THE X ON THE Y. Just reverse each individual connector.
If you don’t want to flip connectors you can change the direction the motor spins in firmware with a $3 command ($3=1 is the default value). That way you can leave it wired as depicted.
Here’s what it looks like installed. It truly is a drop in replacement. No fancy re-wiring required. Just 4 connectors on the board, remove one connector from the power supply and add a PWM wire from the board to one connector pin on the power supply that you removed. 5 minute job.
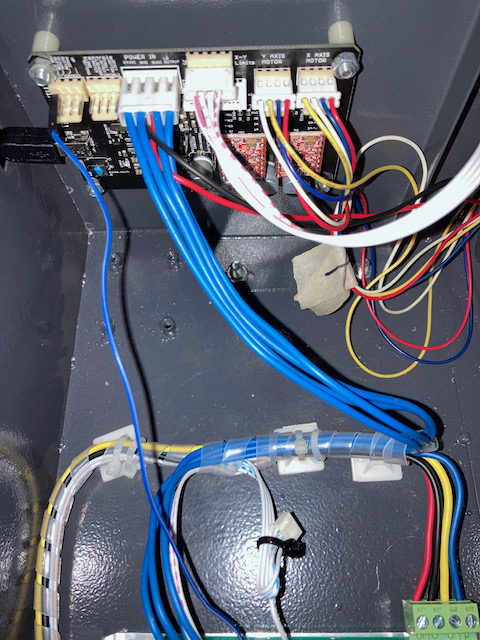
Mini-Gerbil board for K40
On initial power up of the K40 after installation ONLY THE RED POWER BUTTON WILL LIGHT UP. THE MINI-GERBIL HAS TAKEN OVER THE MACHINE. THE LED AND BUTTONS FOR POWER SETTINGS AND THE TEST FIRE BUTTON DON’T LIGHT UP ANYMORE.
This is a minor bummer but the reality is YOU DON’T NEED THAT ANYMORE. Your K40 is Software, not hardware controlled anymore. It’s all good and in my opinion it is better.
Once you open Lightburn for the 1st time you can run the New Device Wizard. Mine detected the Mini-Gerbil but detected it as a GRBL-M3 device. You don’t really have a choice but to proceed with that however at the end of Wizard on the finish screen there is an edit button that allows you to run back through the installation. You want to do this and then select “Gerbil-STM”. Gerbil-STM has a faster baud rate and works better.
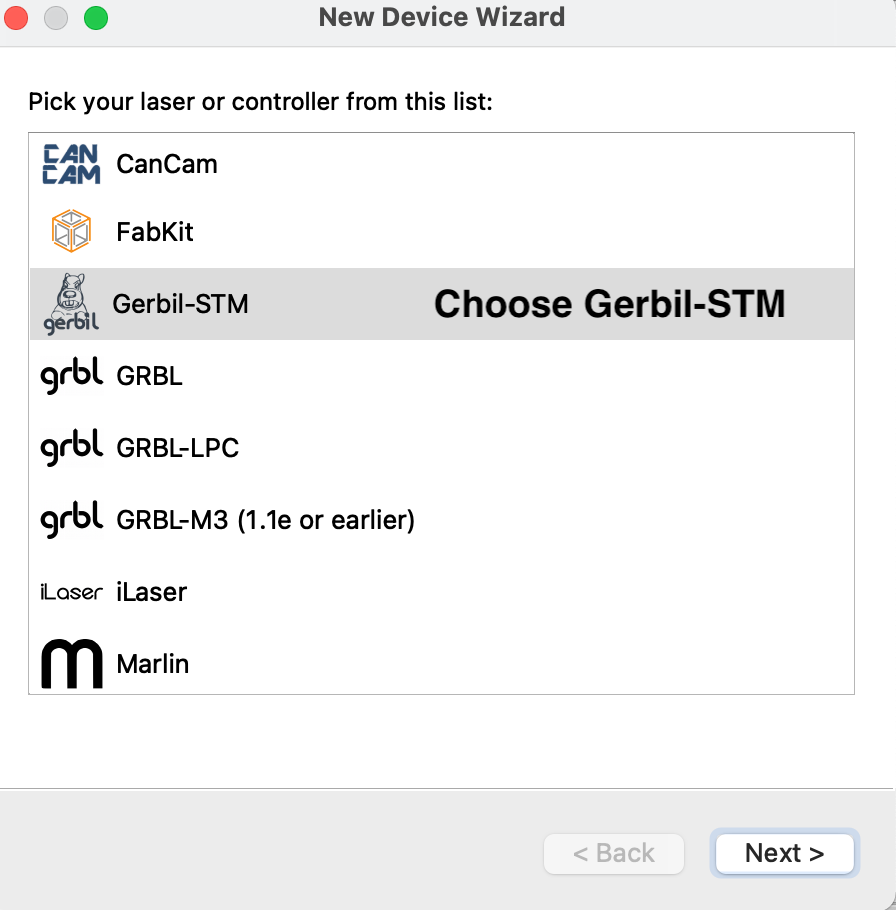
Controller Choice in Lightburn Device Wizard
When we talked about stuff not working on the hardware control panel ………so goes it with the Test Fire the laser button. Users need to test fire the laser for a couple of reasons, the most prominent reason being mirror alignment.
You can pass G-Code commands in a macro to accomplish this. Go to the CONSOLE tab and RIGHT CLICK on one of the Macro buttons.
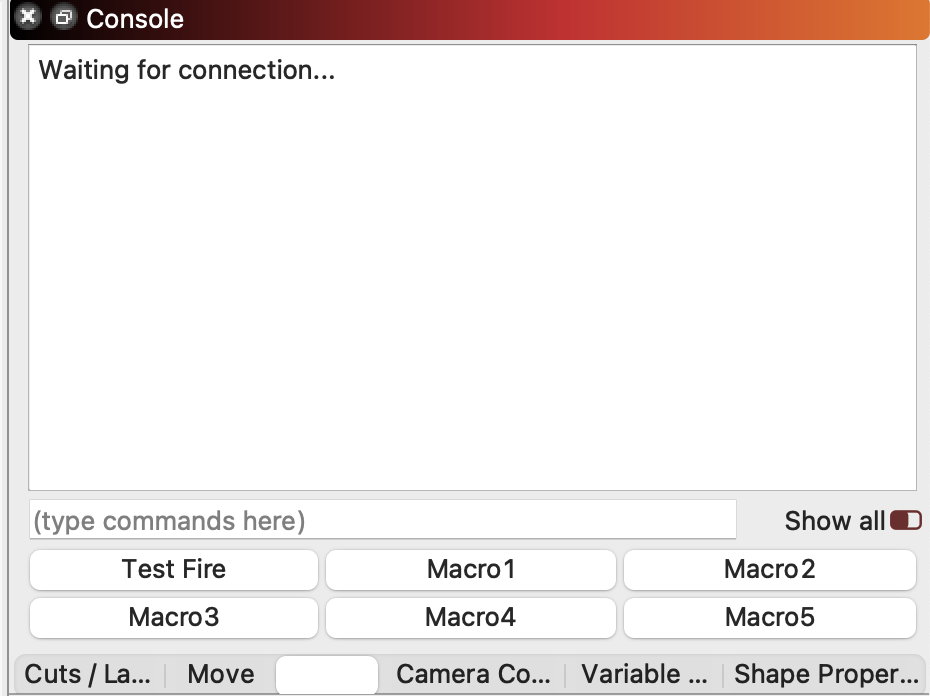
Adding a Macro
A box will pop open and the example code from Awesome Tech on their webpage is this:
$32=0
M4 S200
G4 P10000
M5
$32=1
So I set up my macro, put a piece of tape over the lens and pressed my newly created “Test Fire” button.
POOFA DOOM! FIRE FIRE FIRE.
Okay, I exaggerated a shit load here. But that code fires the laser at 20% intensity for a full second. All an alignment test requires is to make a smoke dot on the tape. I reduced the S number in my code macro to S90. That barely, and I mean barely fires the laser. I strongly recommend using my settings. I talked with the Awesome Tech folks (who are indeed AWESOME, by the way) and they agreed to point that out on their page. To their credit in their detailed explanation further on their page they delve into the fact that you can change the S number so it is documented but Dopey old folks like me are gonna grab their code and run with it.
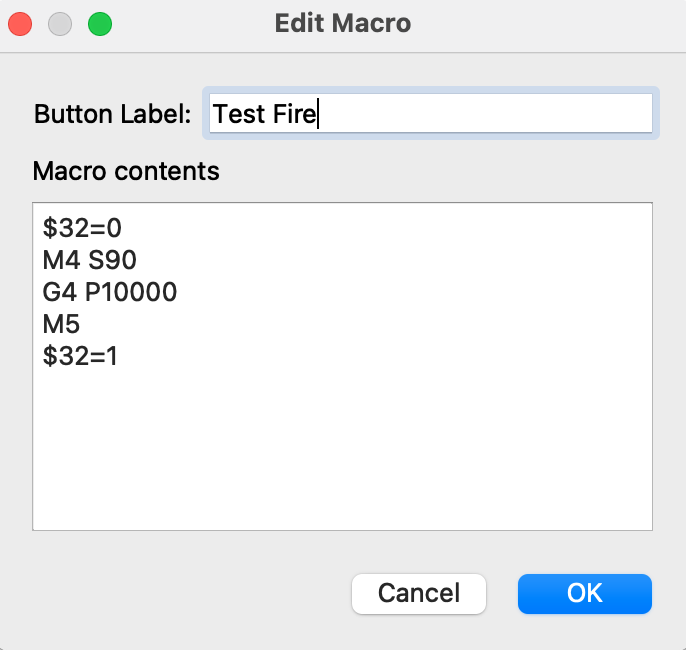
Here’s my code for cut and paste.
$32=0
M4 S90
G4 P10000
M5
$32=1
Since we are making macros…….let’s make a couple more. When you set your laser up you’ll likely set it to “Auto-Home”. The second you start Lightburn and the K40 is on it will home itself. When it does that it locks the rails. This is all good and well ………unless you are aligning the mirrors. So lets make a macro to unlock the rails and one to lock it. To unlock, right click a macro button and paste in this code:
$1=125
G91
G0 x0.1
G0 x-0.1
G90
To lock the rails back do this:
$1=255
G91
G0 x0.1
G0 x-0.1
G90
If you just unlock the rail the laser will lose sight of where it is. Only do this for manually pulling the rails around for alignment.
So let me key in on something I just said. I have been swapping emails with the folks at Awesome Tech. First of all you’ll get a response from them. That response will be friendly, helpful and detailed. I engaged them on all this stuff before I wrote this blog and it was all well accepted and again I have to state THERE ARE A TON OF K40 VARIANTS WIRED BY GOD KNOWS WHO AND HOW IN CHINA AND I AM NOT SAYING THERE ARE ANY MISTAKES.
I’m just pointing out the things I noted during my install.
CONCLUSIONS:
- The Mini-Gerbil card works, and it works good.
- You can use it with Lightburn which is the greatest laser cutting software on planet earth, bar none.
- Awesome Tech has great technical support available on their forum and by email.
- I got my card in like 3 days via USPS.
- Now to state the obvious. The Mini-Gerbil is a superior card to the M2Nano. Losing hardware controls on the laser control panel itself while initially confusing turns out to be way more powerful and easy to control all those things in software.
- No knocks on anyone using an M2Nano with Inkscape and K40 Whisperer. An artistic gal or guy with stock K40 stuff could run creative circles around me who can’t draw a circle with a compass and a round can. Use whatever tool or weapon gets you the results you like…….but if you like Lightburn you don’t really have a choice but to change the controller card. Other cards seemed too expensive to me without any real technical benefit (to me for the things that I do).
HAVE FUN UPGRADING AND TWEAKING YOUR K40!…………………John
