
Ortur Laser Master 2 Review
Welcome to my Ortur Laser Master 2 review, and as always I won’t bore you with the things you can read anywhere else, like what models are available and what the real laser power is, etc. You can get that info anywhere.
This is MY shakedown and I like to bring up the things the layman and weekend hobbyist might come up with.
First of all the cheapest place to buy one is Gearbest. You can get the top of the line (20 watt) for about $290. So I ordered one. And I waited and I waited and I waited and the status on Gearbest still showed it not being invoiced. A lot of people on a lot of forums were saying they waited for months.
You can however just order one on Amazon and have it in 2 days. This is what I eventually did. The downside is that it costs like $120 more. I can live with that.
Getting Started
I got the box which was well packaged and the kit was complete. Assembly takes 30 minutes or so, however if you were building your 2nd one it would take about 10 minutes. Translation: The instructions are small and hard to read. I ended up watching an assembly video on YouTube which made the process much, much easier.
When I plugged it in for the first time the machine homed and seemed to be functioning perfectly. There is no software in the kit but you get a QR code with a download link. The included software, LaserGRBL is an old version. Just go download LaserGRBL from here. In the software you download from Ortur though there is a “CustomButtons” file that you will want to install. Download it from here. You’ll find it under the “Software” tab.
Don’t forget to install the Windows virtual com port drivers as well.
Takes another 15 or so minutes to muddle through the drivers, software and Custom Button thing, but basically within an hour of cracking open the box you are laser etching.
Firmware
Upgrading firmware is a WINDOWS ONLY process and I could not do it from a virtual machine or a Windows tablet with Windows 10 on it. No clue why. It worked like a champ on an ordinary Win 10 laptop. From the time I ordered the firmware version was 137 and of course they released a new one (140) just before I received this machine. Figures. My point is …….don’t even try to upgrade firmware with a tablet or on a virtual machine.
Software
LaserGRBL is okay but to really make the Ortur Laser Master 2 sing you’ll want to get a program called Lightburn. It has a 30 day trial and costs $40 (at the time of this review. It is now $60). I bought the software after a day or two. It’s worth every penny and then some. With Lightburn your hobby laser engraver becomes a very, very useful tool. Just get Lightburn. You can do so much more with it. And you can use Lightburn on Mac. LaserGRBL is Windows only.
Exploiting What It Can Do
So……if you read all the specs it will pretty clearly say that you can’t really engrave metal with it. That is sorta, kinda, basically true. But there are some hacks that will allow you to etch or engrave certain items. Case in point, I have a bunch of generic Altoids tin boxes that are Anodized black tin or aluminum or something. If you take a sharpie and paint the top of the surface you want to etch it will dig right in.
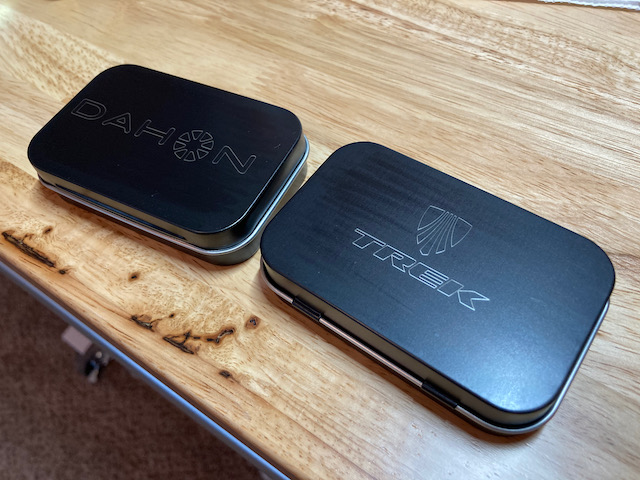
Etching of Altoids Tins with Ortur Laser Master 2
One of the more interesting projects out there, which you also aren’t really supposed to be able to do with this machine is to etch ceramic tile. You can buy tile for $0.15 each at Lowes and spray paint them and etch out photographs EASILY in Lightburn. Here’s my favorite one I’ve done so far.
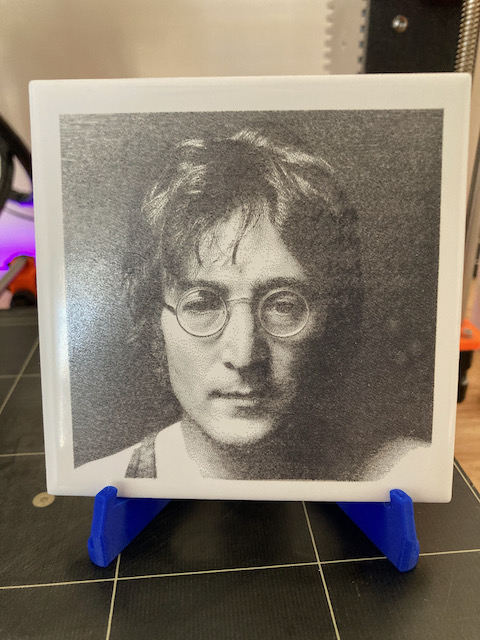
Etch of Ceramic tile on Ortur Laser Master 2
Not only that but vector files come out looking AWESOME as well on tile.
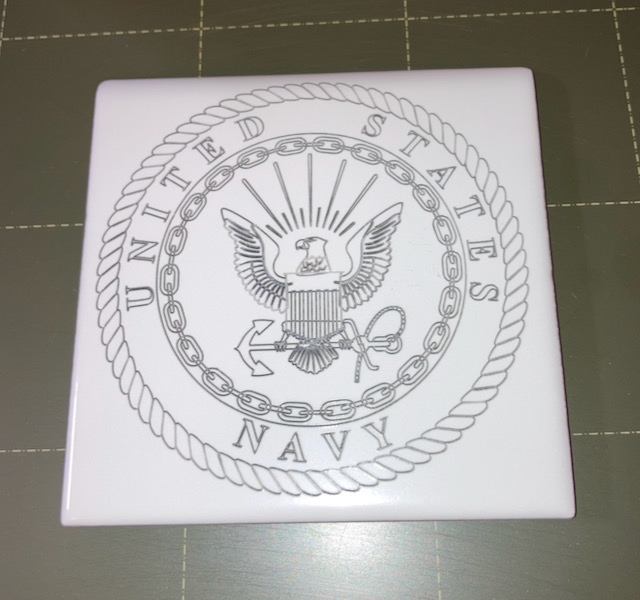
SVG file on Ceramic tile on Ortur LM2
Some folks play around with painting layer colors on their tiles and setting the etch depth to the coat of paint. The end result is that you can have multi colored etches. I haven’t dabbled there and it does require some painstaking setup to achieve the results you want but it is certainly doable. You just gotta take the time.
Cutting
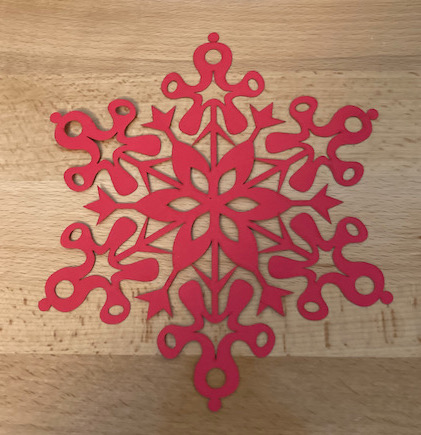
It can also cut through 3/16″ plywood as well. (I used air assist for cutting). The edges got a little charred but a couple of swipes with sandpaper cleaned them right up. The pic below shows the piece on the left straight off the laser bed and the piece on the right has been cleaned up with sandpaper (hand sanding).
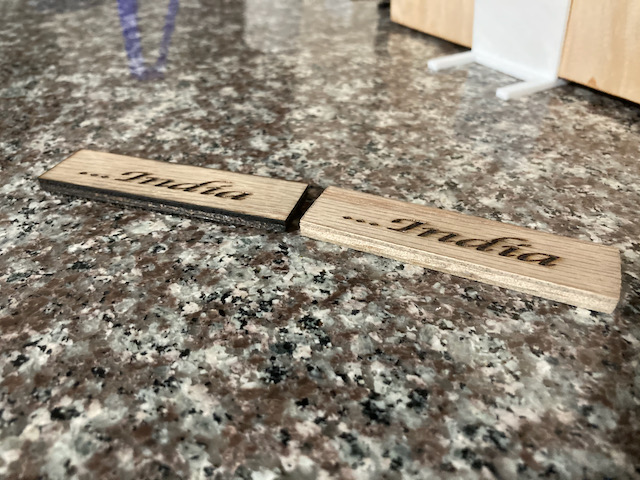
3/16″ plywood cut at 300 speed and 100% power @ 25 passes
I can’t imagine me doing a lot of this kind of crafty thing but it’s nice to know I can cut intricate designs out of card stock, construction paper, or cardboard.
Engraving
And finally I was able to use it to etch a speaker I built for my police scanner.

Sky is kind of the limit here, folks.
Air Assist
So right out of the box you can etch wood, tile, some metals, etc. It will cut thick cardboard and thin plywood. Imagine the crafting possibilities. If you want to cut and cut cleanly you’ll want to add an air assist to your setup. That only involves 3D printing a part to hold your nozzle, having clear 6mm tubing, and an air pump of some sort.
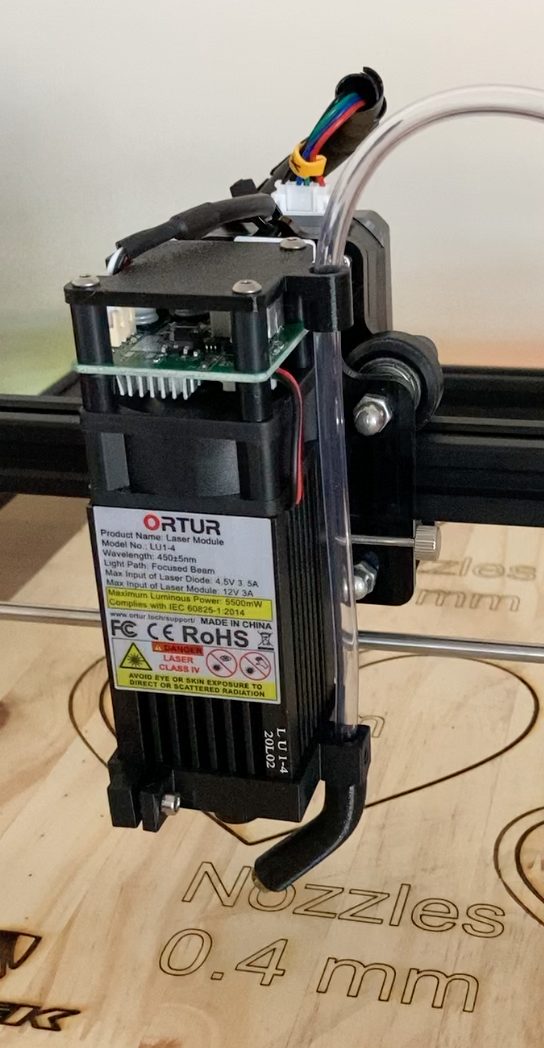
Air Assist added to LU1-4 laser module
Using an air assist will give you faster cuts, and cleaner cuts. It greatly reduces the burning as you can see in the pic above in the lower left corner. I really smoked that Trek Logo in but good. The same laser settings also cut the “Nozzles 0.4mm” cut. Much, much cleaner.
Spoil Board And Grid
While we are talking upgrades one of the best things you can do is to simply mount the thing to a board. My board is 24 x 22. I 3D printed some holders around the feet which keep it secure but you can still lift the printer out and off the board if you need to.
Once mounted to a board you can design or download someone else’s grid lines and etch it into the board.
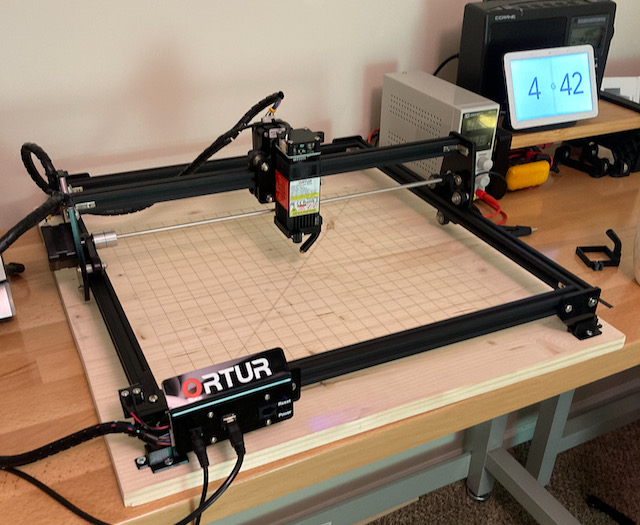
Ortur Laser Master 2 on base with grid
Focus Block
The last little hack I did was that I seemed to get a newer version of the 5 watt laser. Rather than have a thumbwheel to focus the laser the lens is a fixed focus lens and you focus the laser by adjusting the height from the cutting surface. For that they give you a machined metal rod that is about 30mm in length. That focus for me is fine on wood but when etching tile and trying to achieve the right colors I need to dial the distance up another millimeter or so. At any rate I’ll call it a “pre-focus” block. It gets you in the ballpark. Anyway, I kept misplacing the rod so I designed and printed up a holder for it so I would always know where it was.
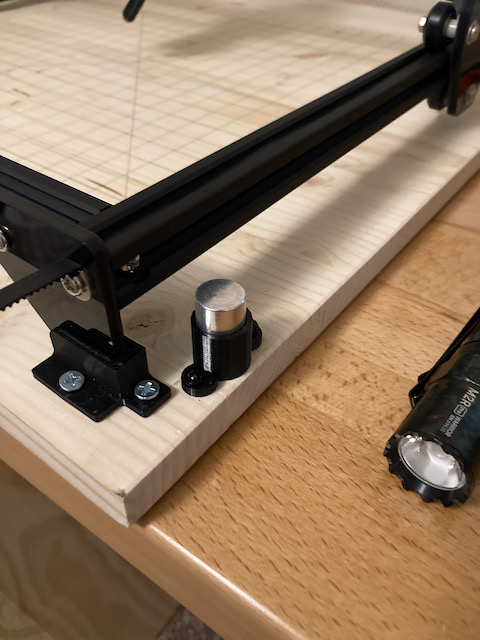
Stowage for focus calibration block
Conclusion Of The Ortur Laser Master 2 Review
Just by itself the Ortur Laser Master 2 with LaserGRBL software is a viable hobby device that is lots of fun. Throw in a proper work surface, Lightburn software, and an Air Assist and you have just taken it to a whole new level. Oh, I have got to add that you will probably want to pick up a pair a REALLY GOOD Laser Safety glasses as well.
This device may look simplistic but it is no toy. It’s a fairly strong diode laser capable of starting a fire or ruining your furniture that it is setting on when you miscue. And you will miscue while you are learning.
I don’t have a “Stars” system here but if I did I would give this Ortur Laser Master 2 a whole bunch of them.
From a geek or hacker standpoint I also want to say that if it were to break that it is pretty cheaply repairable. Heck a new laser costs $120 or so. The stepper motors (NEMA 17) are in every freaking 3D printer kit and laser kit there is and are cheap and plentiful. You could rig any limit travel switch up you wanted just about and the build hardware is cheap as well. Heck you could source parts and build one of these as well cheaply, probably.
If laser etching is something you want to learn to do………don’t hesitate to get one of these Ortur Laser Master 2 machines. To be certain though……if you desire to etch metal you need a much more powerful CO2 laser. But for 99% of what most people would do with an etcher you can do it with this device.
I hope you enjoyed this Ortur Laser Master 2 review.