
OMTech Laser Water Flow Sensor Upgrade
CO2 lasers are water cooled. If the cool water stops flowing the laser tube will die. That’s all there is to it. To prevent the laser from firing when there is no water flowing most lasers incorporate some kind of switch that chops power to the laser circuit when no water flow is detected. In this blog we’ll show how to upgrade the OMTech Laser water flow sensor.
The OMTech Laser Stock Sensor
My new 50 watt laser has such a switch but forums are FULL of reports of failures and especially the fact that the switch will begin leaking.
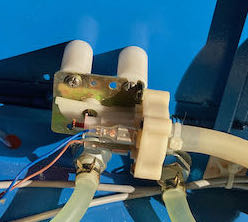
Crap Water Flow Sensor
While this may not be the exact switch, it is darn similar. There is no outlet port on these things. The switch is hooked to a Y valve. One side is inlet, the other is inlet flow and the top opening goes to the switch.
In my mind that doesn’t really measure “Flow”, rather the fact there is water pressure present on the switch.
Let’s say you had a fancy water chiller and the chiller was setting up higher than the laser. Gravity and shit, would put head pressure on the switch allowing it to fire EVEN WHEN THERE WAS NO FLOW. I’ve seen several reports of this already. That renders this switch USELESS. And again, even if it is working right I’ve also read MANY reports of “this failed after a month” or “this started leaking right away”.
Anyway, here is the Switch and Y piping. As you can see water flows up the tube to the switch while simultaneously flowing through the inlet line. Sorry, I don’t like this one bit.
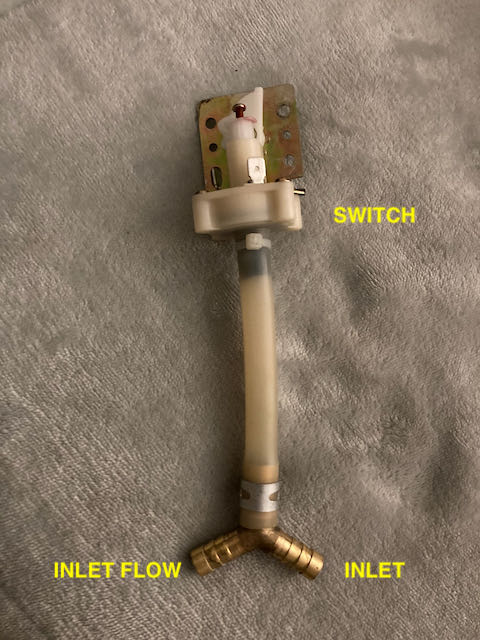
Crap Y valve system
Recommended OMTech Laser Upgrade
So, what’s a geek to do? Change the OMTech Laser crap sensor switch of course. A good replacement switch is the Cloudray HT30.
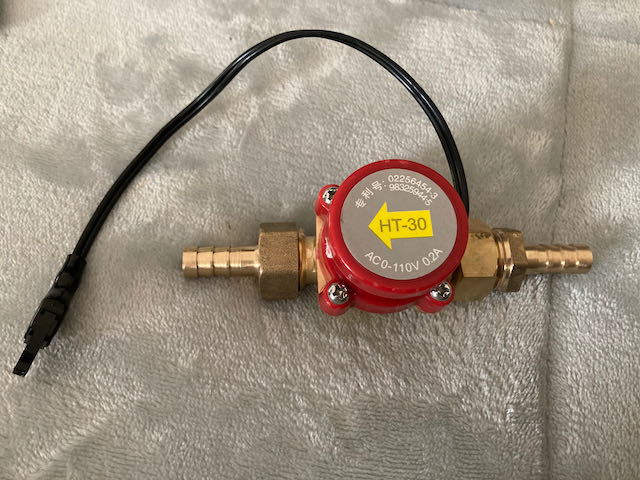
Cloudray HT30
I got mine with 10mm fittings.
How To Best Mount THE HT-30
One issue is that there is no mounting bracket in the OMTech Laser that I am aware of for this sensor switch so I designed my own. The original switch is mounted on two teflon stand offs with a 30 mm spacing. Here is a link to my mounting bracket.
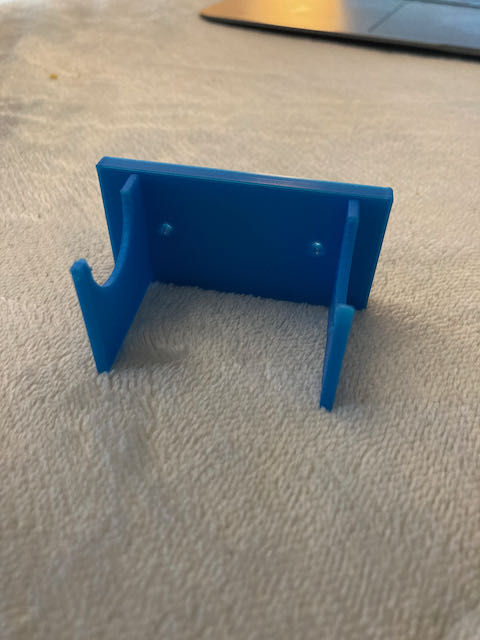
Ingenious Fucking Mounting Bracket for HT30
Here’s what it looks like on the stand offs.

HT30 Bracket installed in Laser
Here’s what it looks like all done. I zip tied the HT30 in for additional security.
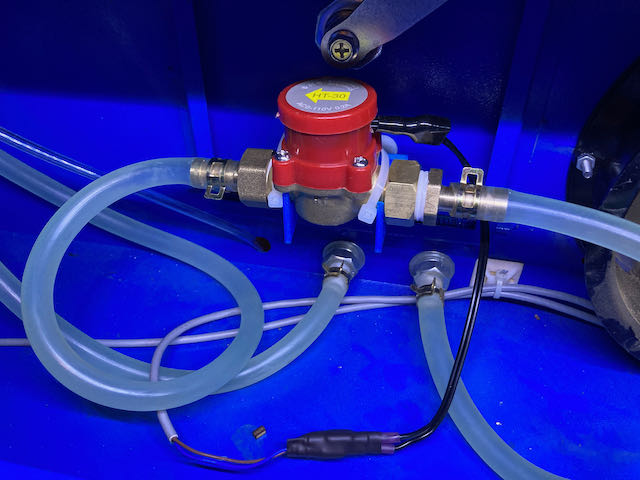
All you really do to install this is to connect the two existing wires from the old switch to the new switch. I cut the plug off of the HT30 and crimped spade connectors on and then double heat shrinked them.
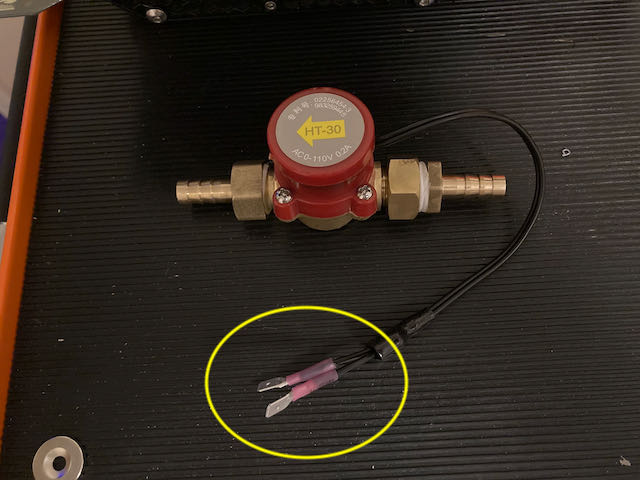
Spade connectors on HT30
Then add teflon tape to the brass connectors, make sure the seals are installed inside and tighten them down good. Then just plug in the switch and connect the inlet water hoses.
FINALLY, AND THIS IS IMPORTANT. TEST IT. MAKE SURE IT WORKS.
Do that by setting up your laser normally and just firing a pulse from the control panel. Now, pinch the inlet tube (if you have a chiller it will alarm) and then while holding the pinched inlet line, try to fire another pulse. You should get a failure indicator on the panel and the laser SHOULD NOT FIRE.
Mine works perfectly and prevents the laser from firing when there is no flow.
Once you pinch the hose you could create some air bubbles so before you start layering stuff GET RID OF THE AIR BUBBLES. I created a few doing this test.
Summary: Get rid of the cheap POS water flow sensor switch that comes in these lasers and mount it on my super cool bracket! Seriously though. My bracket is not the greatest design but it does work. I really encourage someone with great CAD design skills to improve on my design.
Keep your laser cool and your lady not.