
Ortur YRR Rotary Setup
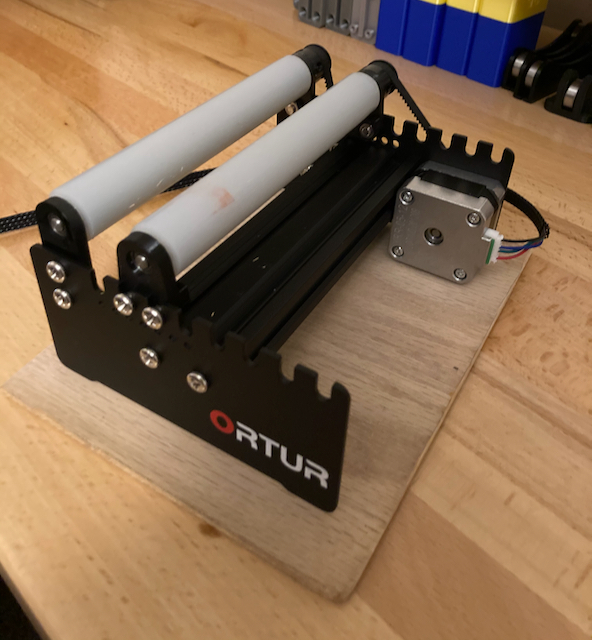
Ortur YRR Rotary Device
Picked up one of these Ortur YRR Rotary Rollers to supplement my Ortur Laser Master 2. There are a lot of videos online showing you how to assemble it as it comes in a kit form but not much information on how to make it work in software.
That’s why you have me.
I spent a couple days researching how to set it up and never really found an “AHA” video or webpage but after viewing a dozen or more items I had a good idea of what to do.
I’m going to set mine up in Lightburn which is a pay program ($60). If you have a GRBL laser cutter, Lightburn is worth every penny.
Getting Started With Ortur YRR Rotary
Connect your Ortur Rotary Roller to the Y axis with the supplied extension cable.
Now lets turn on the rotary support in the program. Go to “Lightburn > Preferences” and enable rotary support.
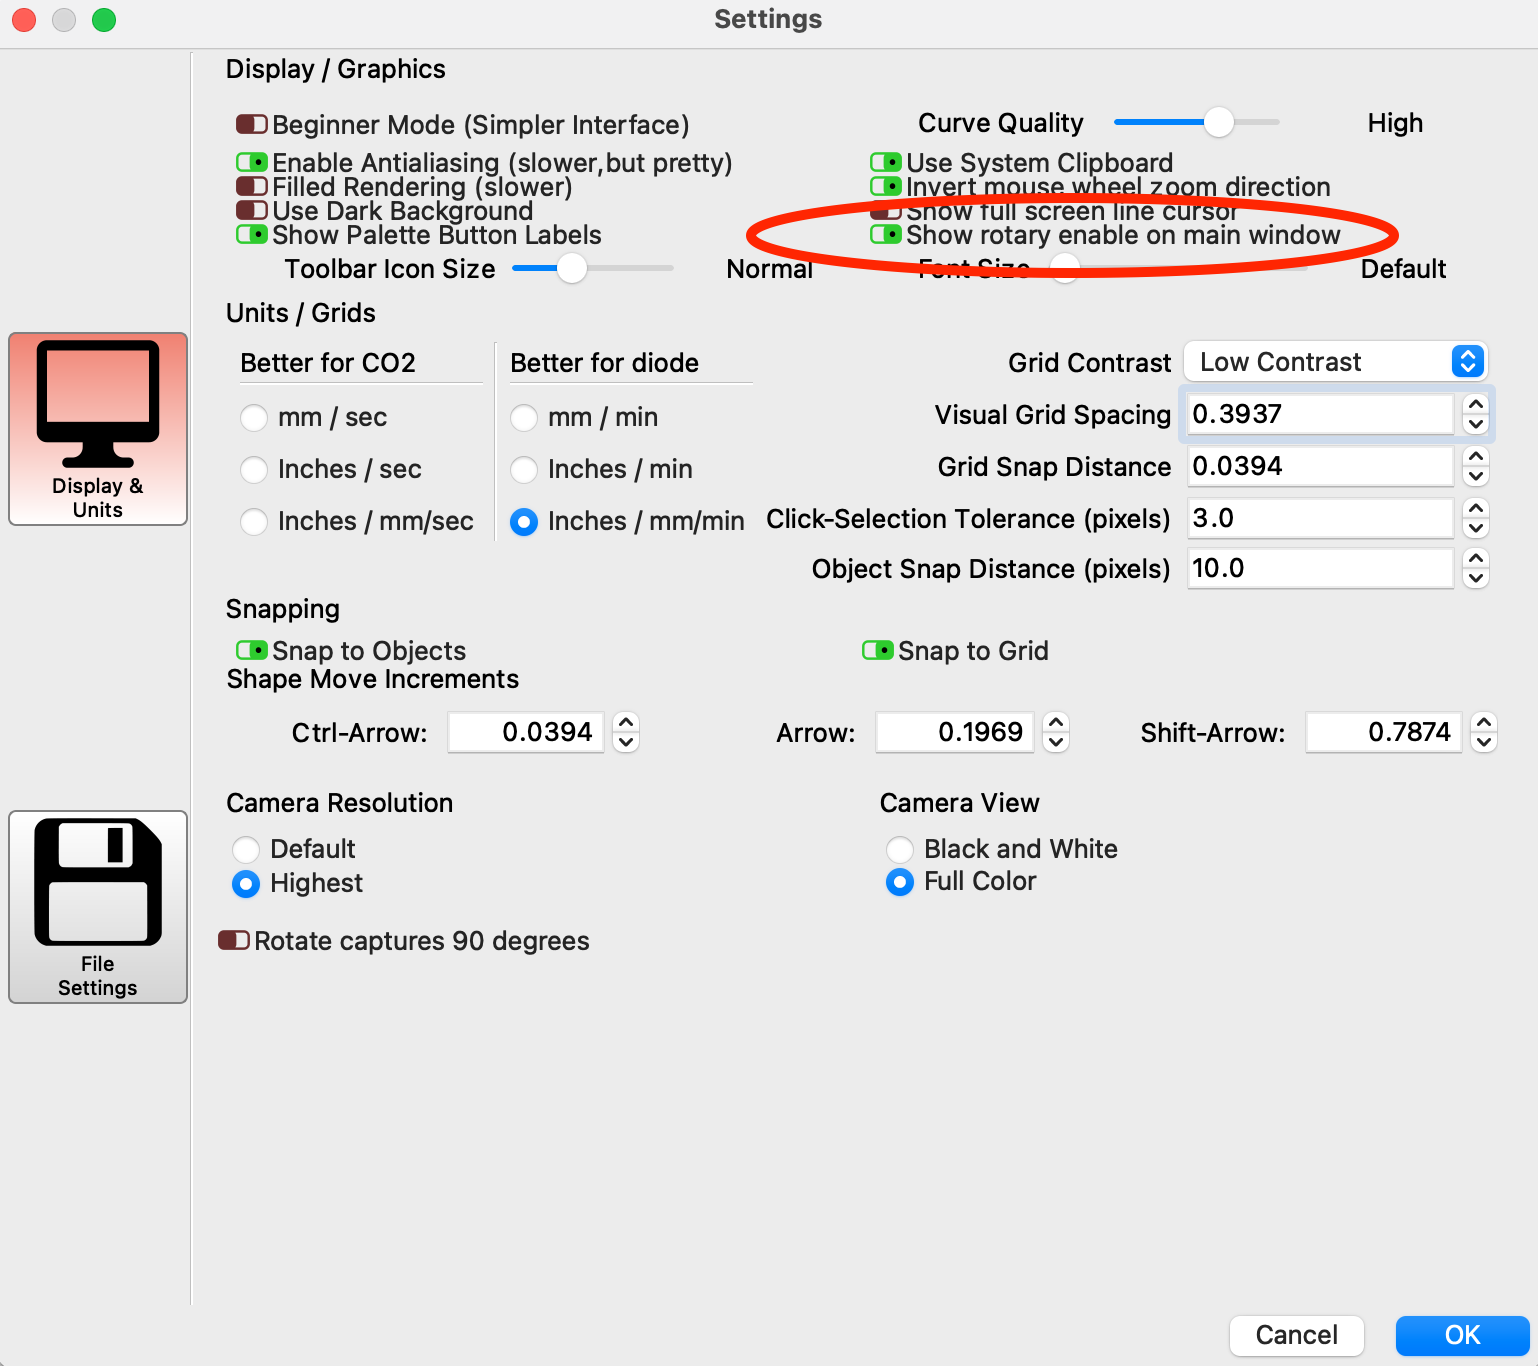
Rotary Enable
You will then find the toggle on main window. Turn it on.
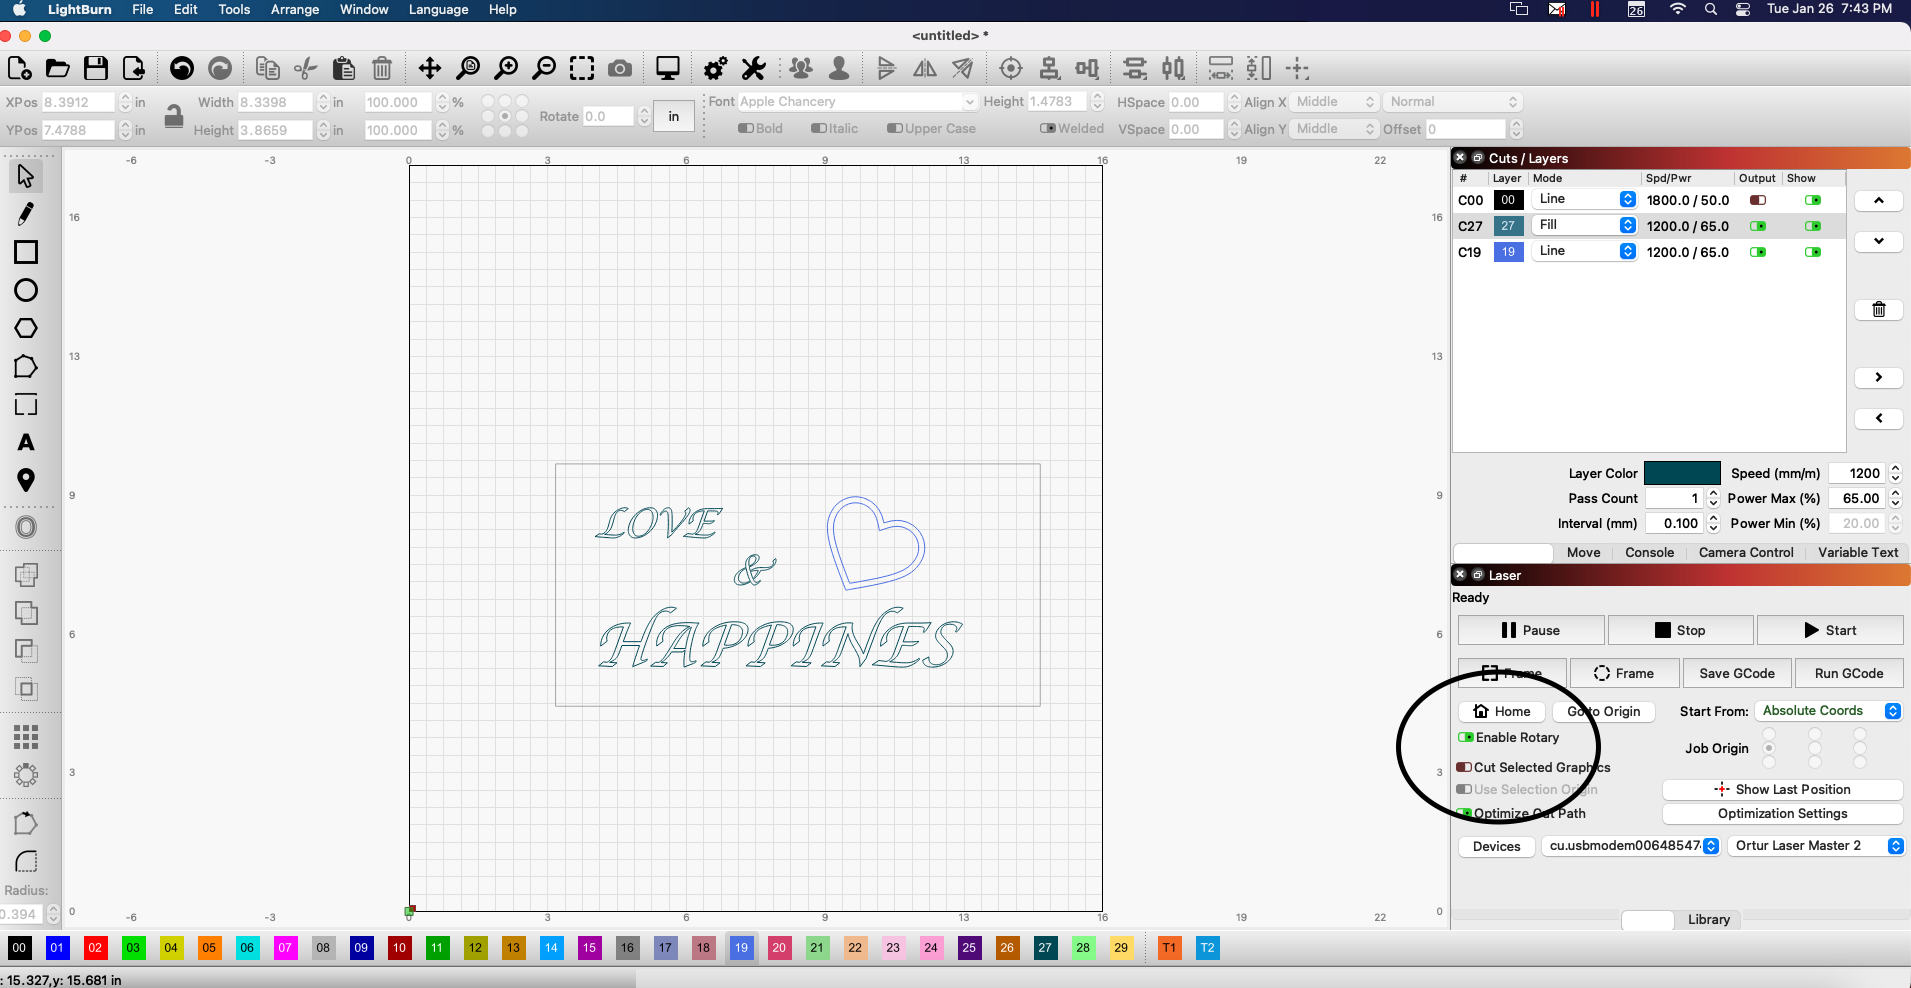
Enable Rotary
Not done yet. If you have your Ortur Rotary Roller connected and Rotary enabled and you start pushing buttons your machine will home to the left and the roller will spin, and spin, and spin. It won’t hit the mechanical switch that the Y axis is used to hitting so it will run for a bit and then you’ll get an error that things are out of limits.
Machine Settings
Now you want to go to “EDIT > MACHINE SETTINGS”.
IMPORTANT: SAVE YOUR SETTINGS and call it “Default Machine Settings” or something like that. Whatever you do to make the rotary work you’re going to have to un-do to make the Laser Master 2 work again.
Now set “Soft Limits” and “Homing cycle” to false.
IMPORTANT: Save these settings to a file called “Rotary Machine Settings” or something like that.

Rotary Setup
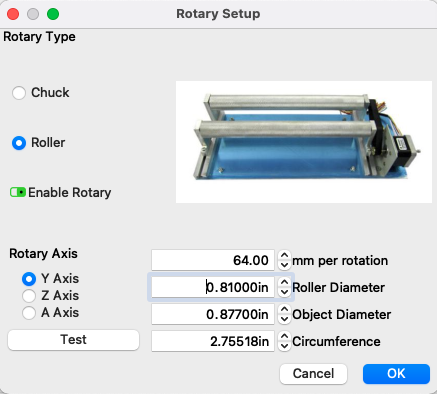
Now go to “TOOLS > ROTARY SETUP”. Select the Roller Button. Also make sure the “Enable Rotary” slider is turned on and green.
Measure Twice, Cut Once
At this point you need dial calipers and need to measure the Ortur rollers and the diameter of the thing you want to etch or burn on. Fill in those values and you will get the circumference. Mine equals 2.755″
Go to the Lightburn working area and simply draw a box that is 2.755 inches tall. Doesn’t matter how wide it is (but not wider than your part) but the height of the box needs to equal the circumference of your item. NOTE THAT MY HEIGHT EQUALS 2.755 INCHES.
Draw a much thinner box inside that box and also make sure that the height is 2.755″. Put it on its own layer and turn off output for the outer bigger box. You will cut this small box on a scrap part. If you don’t have a scrap part put a bunch of tape around the part you have and use low power on the laser enough to cut the tape but not cut through it.
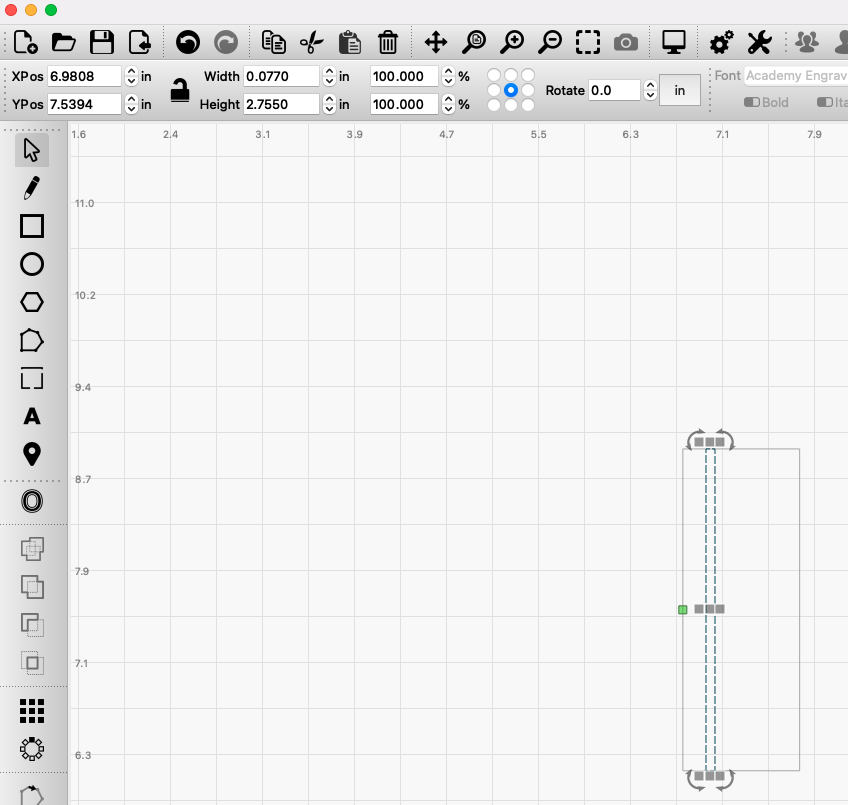
2D Representation of your part
Frame and Test
Now you simply frame up the part to make sure you aren’t shooting laser beams everywhere and then hit START and etch. I used a piece of scrap dowel rod to set mine up.
The goal is to have the etched box ends touch as depicted in my picture below.
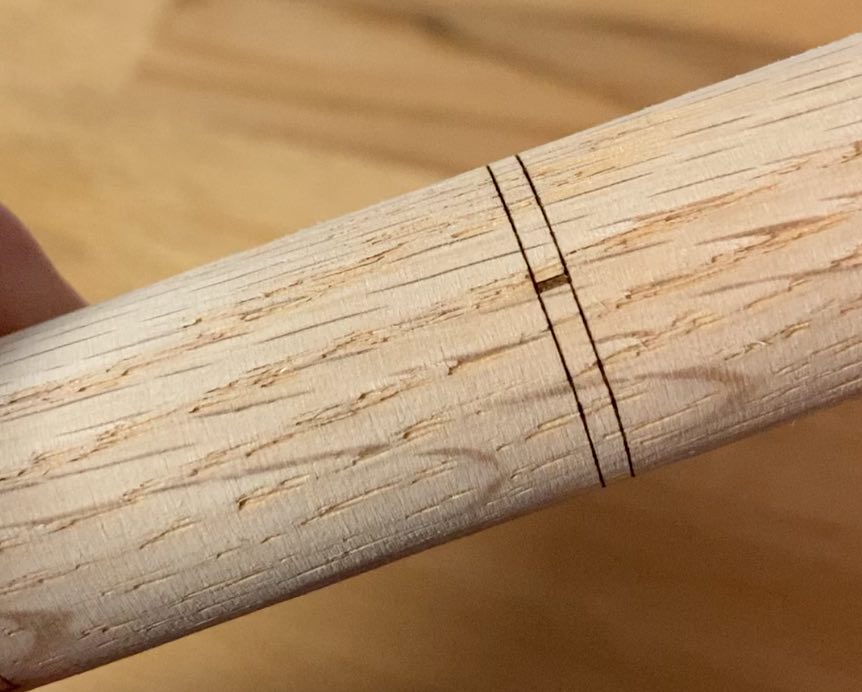
Good result
If the box doesn’t quite reach then go back to “TOOLS > ROTARY SETUP” and increase the number in the “mm per rotation” block. If the etch went too far, then reduce the number in the “mm per rotation” block. Do this until you get the perfect etch as I did above.
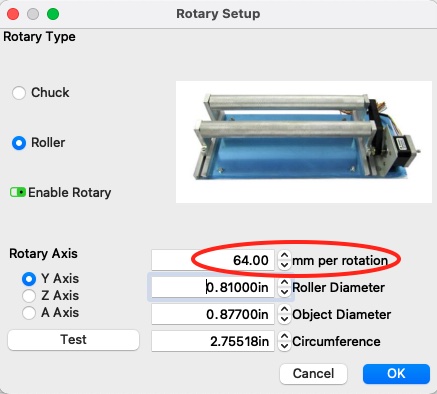
mm per rotation
Be sure that every time you put a new item on the Rotary Roller that you change the diameter and circumference in TOOLS > ROTARY SETUP. I ultimately tweaked mine down to 63.5 mm which seemed to be spot on. Video of the process here:
Hope I captured enough information here to help you if you bought one of these things and are scratching your head wondering how to set it up.
Pingback: Ortur Rotary YRR 3.0 Review - THE LASER OG BLOG