
Ortur Rotary YRR 3.0
Some years back I owned an Ortur Laser Master 2 and coupled it with the Ortur Rotary YRR 2.0. It seemed like setting it up was a dark art back then. I’ve since sold both of them and upgraded to an Ortur Laser Master 3 and now have added the Ortur Rotary YRR 3.0.
First Impressions
Just like the Ortur Rotary Chuck YRC 1.0 the damned thing does NOT directly hook up to their own lasers. The Laser Master 3, which is their flagship laser, comes with an adapter cable that you must use. This makes no sense to me that the either rotary device that Ortur offers doesn’t contain the cabling you need to connect it. That’s insane.
The manual seems to show how to hook the rotary up to the Windows program LaserGRBL but gives no directions for setting it up in Lightburn.
Also I’ll be darned if I can find a downloadable manual for the YRR 3.0.
And there is no explanation in the manual what the GRBL commands that I mention below actually do. This is really unsatisfactory.
I swear that Ortur is as fucked up as a soup sandwich.
How To Proceed
What You Need
- Something round to engrave.
- Dial Calipers – Recommended
- Optionally you can measure circumference with a measuring tape.
Machine Settings
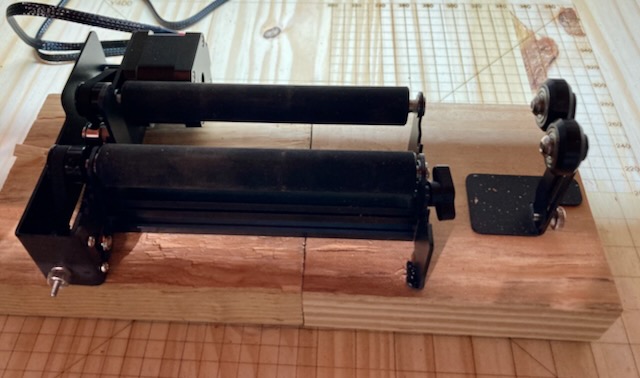
It is actually very similar to the YRR 2.0. It is just a little sleeker looking, a little longer, and has a wider roller separation. Setup should be darn near exact to the YRR 2.0. Make the following changes to your GRBL by passing these commands into the Console one at a time.
$20=0
$22=0
$101=80
$121=400
$141=600
You can also go to Edit > Machine Settings and toggle off “Soft Limits” ($20), “Homing Cycle” ($22). Then set “Y Travel Resolution” ($101), and then change the Y axis acceleration ($121) to whatever speed you like. The default is 1800 and I found it just spins things wildly. I set mine to 400 however am considering setting it to 300 even.
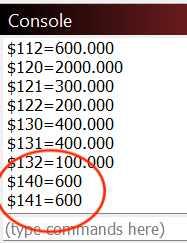
Lastly the “Y axis motor current” ($141) should be reduced to 600 mA. Default setting is 1000 mA (1 amp). Running at 1 amp probably won’t kill ya but it might run hot.
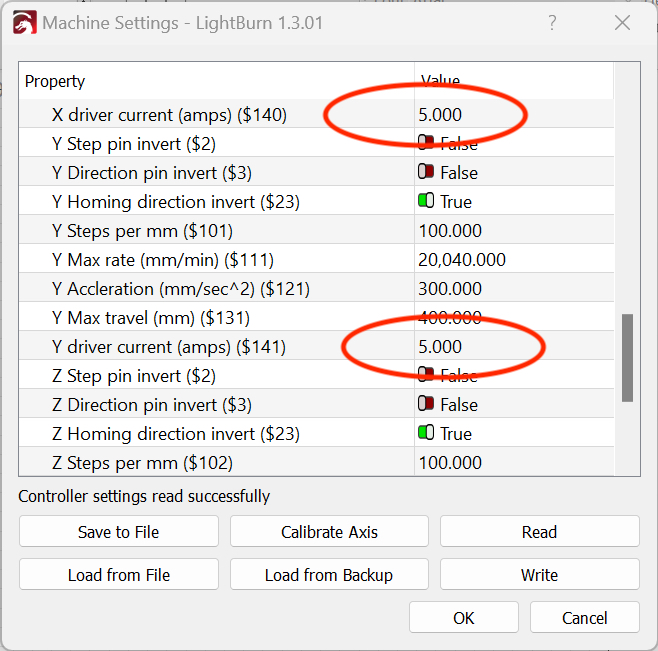
Here is what is weird though…….If you issue the command $141=600 it will work, however if you go into machine settings after doing this, it says that $141 equals 5 AMPS! I suspect this may be a max value Ortur plugged in so you can’t smoke your motor but it sure is weird. The value does not change. Bug or feature?
What this really means is that no matter what you MUST issue at least the $141 GRBL command manually in the console. It would be great to alter the Machine Settings and simply “Save To File” then “Load From File”. You can’t. In other words this is a mess.
None of this is clear in the manual and is ATROCIOUS.
To put things back to normal, non-rotary operations, issue the following commands.
$20=1
$22=1
$101==100
$121=1800
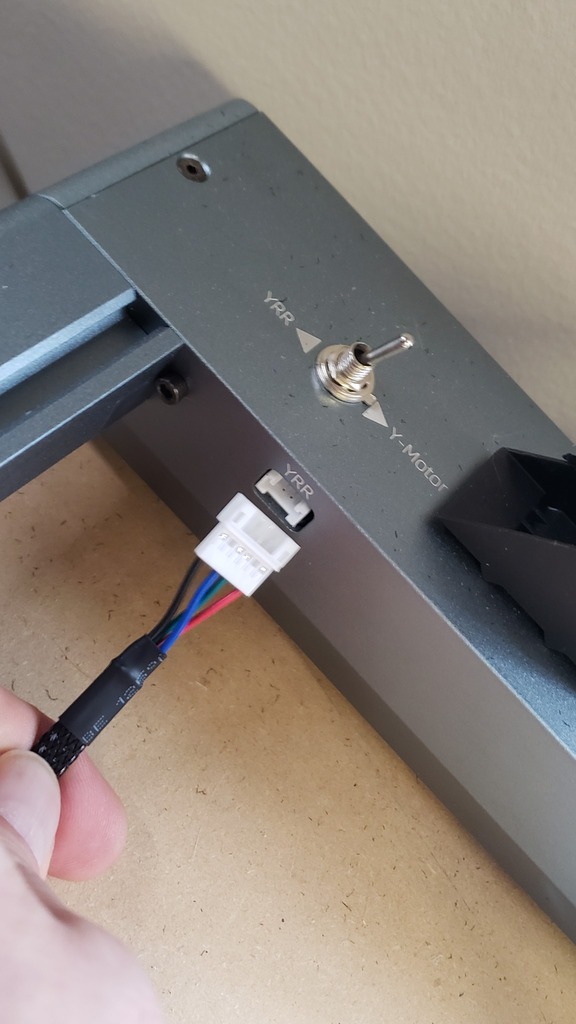
$141=1000Don’t forget to flip the Y axis switch on your Laser Master 3 as well back to the normal position.
Lightburn Settings
Once you prepare your machine by issuing your GRBL changes you can open Lightburn and go to Laser Tools > Rotary Setup. You need calipers to measure the roller diameter and the diameter of the object you are engraving. Don’t worry about the mm per rotation just yet. Also, select Roller and Enable Rotary and Y axis.
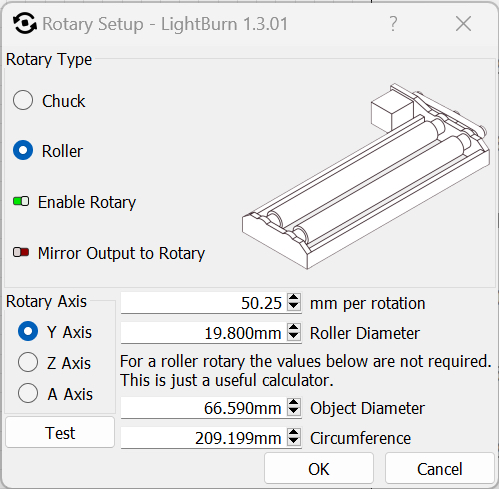
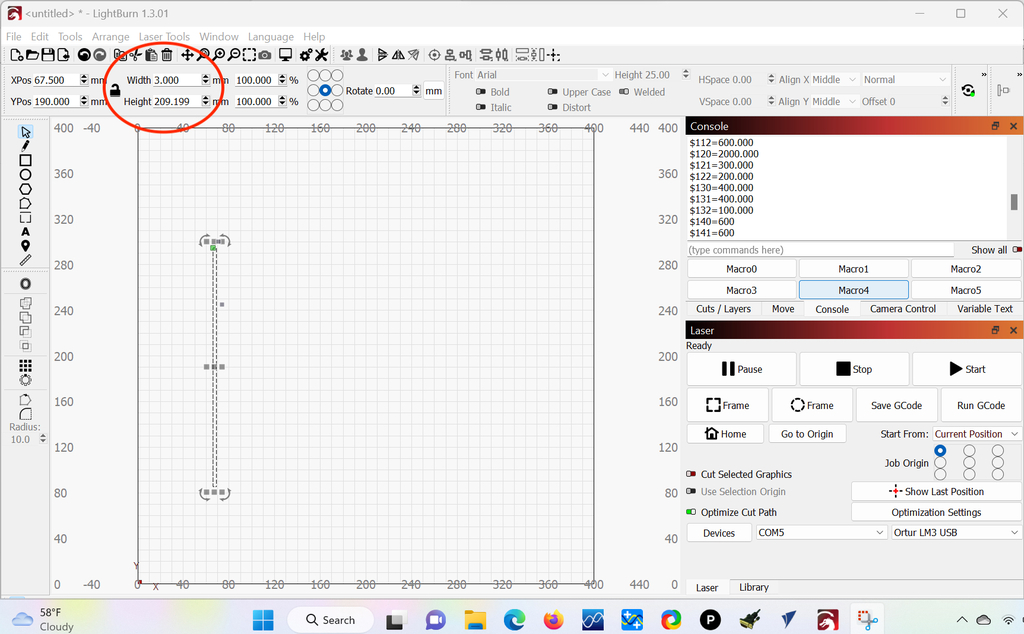
Note that my circumference is 209.199 mm. In lightburn make a rectangle that is that dimension and about 2-3 mm wide.
Set your “Start From” to Current Position and align the laser over the center of the object you are engraving. Put a mark on the starting location and then do a Frame operation. If all goes well the round part will spin exactly to your mark and then back. If it doesn’t you need to adjust your steps per rotation.
You can also hit Start and initiate a burn. Here is one I did on an aluminum can with blue painters taped wrapped around it. Tweak your Steps Per Rotation until the burn meets on both ends perfectly.
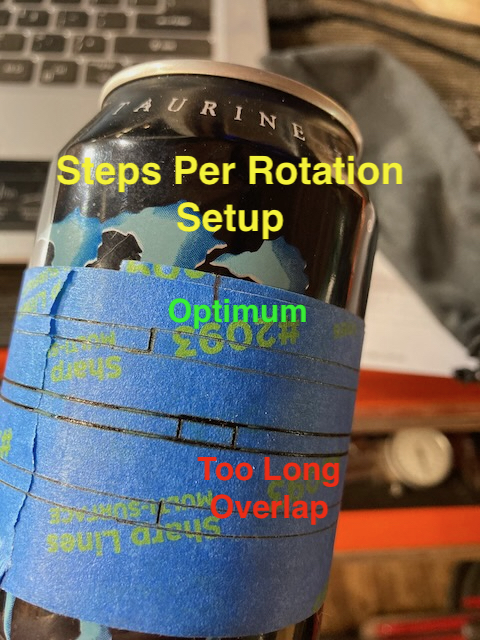
That’s really all there is to it. When you burn the circumference rectangle and the ends meet your laser/roller is set up correctly. My magic number ended up being 50.25mm. That does NOT mean that will be your magic number.
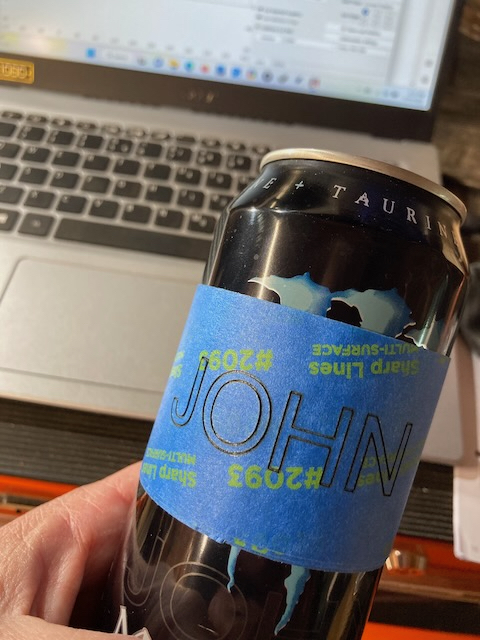
Following this setup I made my name, rotated it 90 degrees and burned it. Perfection.
You should be able to perform rotary operations perfectly now. And that is provided you set your object up correctly. Always frame, frame, frame and observe the movements for dancing, bouncing, and movement. Don’t burn anything until you know the operation and movements are SMOOTH!
Conclusions
It is a good roller, but it is just a roller. xTool makes an RA2 Rotary Pro which is a roller AND a chuck. Not only that they provide PERFECT and MUCH EASIER instructions for setting up the RA2 Pro.
The Ortur YRR 3.0 works and I’d like to say the documentation is horrific but there isn’t any real documentation to speak of. Yes, I made it work, and yes I wrote some easier to follow directions but this is a nightmare for new users.
Good morning,
Following a wrong manipulation I damaged my YRR cable of my OLM3 laser.
Do you know where to buy one or where to find the wiring diagram?
Sincerely.