
Monport Laser 80mm Rotary Table
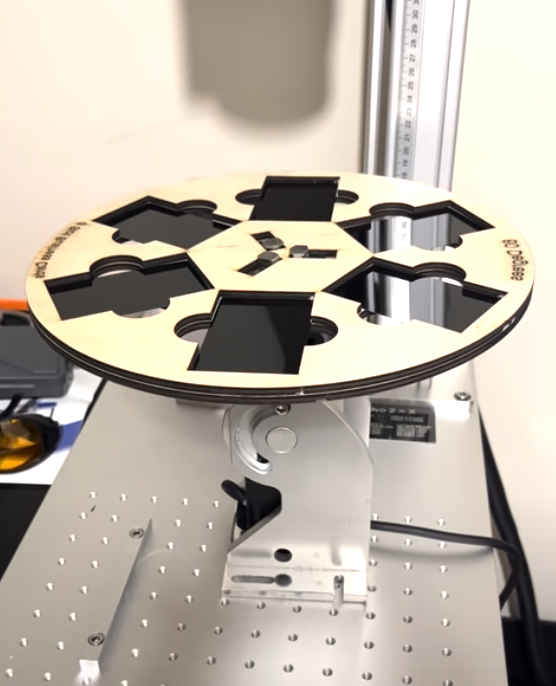
We typically think of a rotary device being used to laser engrave round items. But did you know that you can set your rotary up on a horizontal plane to engrave multiple flat items? In this example I’ll use my Monport laser, 30 watt fiber with the 80mm rotary chuck to engrave 6 business cards at once.
While this is actually really easy I haven’t found a definitive place that covers all the basics of setup for this operation. And that’s what I try to do here at John’s Tech Blog. Make it simple and include important steps that just aren’t clearly documented elsewhere.
Template File
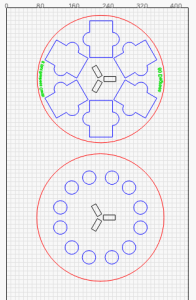
While I probably could sit down and design a template, there are files available for a few dollars on Etsy. I settled on this one which is perfect for this application. Cost was $5. I cut mine out on my xTool D1 Pro 20 watt laser (extended bed).
It simply wasn’t worth my time to design something from scratch and go through all the trial and error. $5 is a bargain for this SVG drawing.
It has space for 6 standard sized 86 x 54 mm business cards.
After cutting out both circles you simply align them and glue them up together. I used 3mm plywood and clear wood glue.
The business card slots are 60 degrees apart and 60 x 6 = 360 degrees. π r2 and stuff.
Now we need to configure Lightburn for this cool template file. Set your rotary so the chuck is facing up and ensure it is able to spin freely.
BONUS!
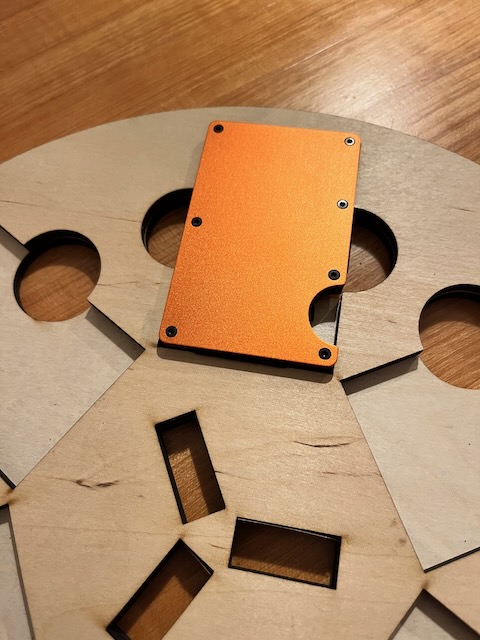
Not only does the template fit 86 x 54mm business cards it also fits RFID card wallets!
Lightburn Configuration
Here’s the interesting part of this rotary setup. In Lightburn you DO NOT enable the rotary.
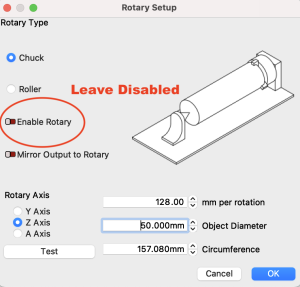
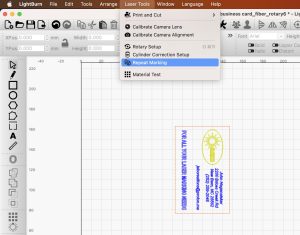
Seems crazy that the rotary is not enabled when you are using the rotary, but trust me on this one. Instead open your business card and center it roughly on the grid. Then go to “Laser Tools” and then “Repeat Marking”
This box will pop up. Set the “Count” to 6 and hit the calculate button. It will set up a parameter of 60 degrees.
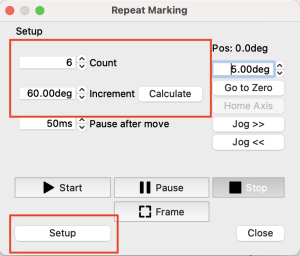
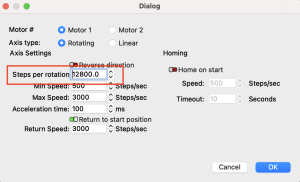
Now hit the setup button and set your Steps Per Rotation. Mine are 12800. I show you how to determine steps per rotation in this post.
Hit okay for everything. With your business card selected hit frame and make sure everything is going to happen where you expect it to happen. MOVE THE ROTARY to match the framing operation. Once your business card is aligned then you can hit start. On my card I used 1000 speed at 40% power and 500 lines per inch. Your rotary movements should look like the video below.
Wrap Up
So that’s basically it. The thing that caused me the most trouble was initially thinking that the rotary should be enabled since, hey, you are using a rotary. Don’t do it. Just use the Repeat Markings dialogs in Lightburn.
And burn, burn, burn 6 cards at once.