
Sculpfun S9 Upgrade Kit (33 Watt) Review
The great folks at Sculpfun recently sent me their S9 Laser which I did several reviews of. Also, they very kindly sent me their 33 watt Sculpfun S9 Upgrade Kit which upgrades the kit from approximately 5.5 watts to a FULL 33 WATTS OF POWER to review.
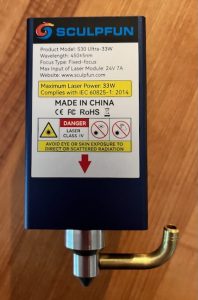
Diode laser modules are roughly 5.5 watts and to obtain higher wattages, multiple diodes are combined into one beam. In the case of a 33 watt module that means there are 6 individual blue diode laser modules.
There is one important point that I would like to make before I begin this review. Let’s get to it, shall we?
Initial Impressions
I got my first desktop blue diode laser in about 2019 which is when they were pretty much first commercially released. Prior to this it was purely DIY. Since my very first laser purchase I learned one very important lesson.
- If you intend to make money with a laser you absolutely MUST have either spare parts or a back up laser machine.
I cannot count the number of times I have seen laser forum users state that their machine broke and they have orders to fulfill.
That leads me to the point I want to make. The kit contains an upgraded main board and a new laser head. Those are the most common failure points on a desktop laser. Purchasing an upgrade kit allows you to easily restore the S9 to its original configuration in the event of a problem. Essentially, you have all the parts you need to maintain laser operations. This means you don’t need to purchase additional spare parts or purchase a backup machine.
While this may seem fairly inconsequential, or something you wouldn’t want to do you will appreciate that you can get operational again in just a few minutes. Minimal downtime means you stay in business. You can’t imagine how important that is.
The Sculpfun S9 Upgrade prices seem to be $499 for the 22 watt kit, and $699 for the 33 watt kit. An S30 Ultra 33 watt laser is about $1300 and the upgrade path is only missing a couple of the bells and whistles. An S9 at $250 + $699 for an upgrade gets you close to the Sculpfun flagship laser. And like I said, if something breaks you can downgrade with your previous S9 parts and stay operational. $950 give or take a few dollars is a great price for a state of the art laser and essentially a back up machine (downgrade from parts).
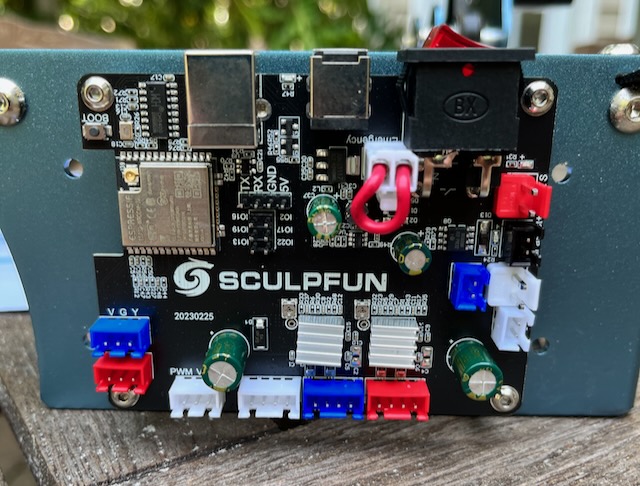
Main Board
One of the missing bells and whistles from the S30 Ultra 33 watt machine is an emergency stop switch. The main board has a connector for that and is jumpered with a heavy gauge red wire. You could add your own Emergency Stop switch with a little DIY action.
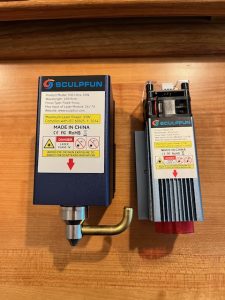
Sculpfun S9 Upgrade Kit 22w and 33w (click pics to enlarge)


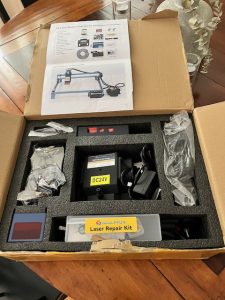
The kits contain:
- Motherboard
- Motherboard Case with Bluetooth Antenna
- Laser Module
- Limit Switch kit
- Power Supply
- Fixed Board
- Cabling
- Air Assist Pump
- Air Assist Tubing
The kit is very well packaged and mine arrived with no issues or damage.
This will turn your previously entry level S9 into a laser that rivals the best desktop diode lasers on the market. The only concessions you will realize is that you’ll lose a few millimeters of useable working area by installing the limit switch kit and by having a larger laser module.
By my estimation and my measurements the working area is reduced to about
- X = 375 mm
- Y = 380 mm
Assembly
Piece of cake. The only real step that required any thought was fishing the X Limit Switch cable along the X assembly rod. Because the connector is large you have to disassemble and remove the X bar, then slide the roller assembly and mounting plate out. Then you can fish the cable through and reassemble. I’ll mention it in a video clip later.
Really all you are doing is changing the main board and running a new cable assembly and hooking everything up. It’s pretty intuitive.
No reason for me to elaborate as Sculpfun has released an awesome video.
Initial Testing Of The Sculpfun S9 Upgrade Kit
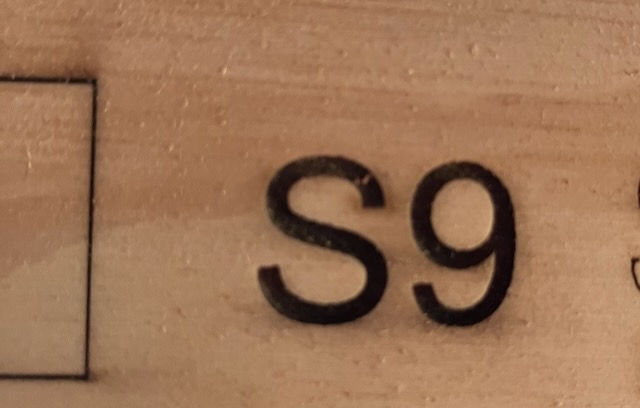
To be honest I got off to a rough start. I made a simple text outline that said “Sculpfun S9 33 Watts” and ran it at 50 mm/sec and around 60% power or something in Lightburn. The results were awful. Jagged lines everywhere.
At this point I checked the tension on all eccentric nuts on both the X and Y axis and re-tensioned all belts. After retesting the results were the same. I could only get crisp lines by going SLOW. Really slow, like 15 mm/sec. Running the same text with “FILL” selected could be run at faster speeds with great results. I conclude that because of the size of the laser module there is just too much inertia and movement there to do precise LINE burns at all but the slowest speeds. THIS IS NOT A PROBLEM FOR ME. It might be for you, but not for me. Here is a video demonstrating what I encountered.
In my opinion to go fast this huge laser module needs to be on a much beefier frame.
Here’s a close up photo of the speed comparisons:
Speed Comparison (click pic to enlarge)

Results of doing Fill vs. Line were above expectations. Only when doing Outlines on small items such as text did I have to slow the laser speed way down. The pic below is not the greatest but you can see the lines are crisp. I ran this at 100 mm/sec.
Sculpfun offers a Linear guide rail upgrade kit which I purchased and will blog about once I receive it. It beefs up the X rail and may resolve some of the speed issues.
Firmware
Shipping firmware is reported as:
Grbl 1.1h ['$' for help]
ok
[VER:1.1h.20230313:]
[OPT:V,15,128]
Target buffer size found
ok
Homing
ok
Sculpfun S9 Upgrade Kit Cutting
Does it cut? You betcha. I have some NASTY 5mm plywood that even my CO2 laser struggles to cut cleanly. At 5mm/sec and 100% power I went through it in one pass. Not much else to say about its cutting abilities. I will of course do some more testing.
Final Thoughts
I’ll do another review in a week or two after I have put this thing through its paces properly.
Do I recommend the kit? Yes. But with the caveat that you must laser small text outlines slowly. The built in air assist that works only during laser operations is AWESOME. The air pump is silent, but as I mentioned in the video the laser module itself is fairly loud.
I really need to stay within a budget of around $500 to $600 in the beginning. I have watched a lot of reviews and comparisons on different machines. Each of them sell upgrades and accessories. I want to be able to burn on uneven surfaces like a wooden bowl. These are accessories. I have yet to get any representative to contact me to answer questions that aren’t covered in the reviews or videos. you got one sent to you. I can’t even talk to a live person. Any ideas?
The only way you can burn on uneven surfaces is to be able to auto adjust z height. The other option would be to break your design down into a whole lot of different layers and manually focus between each one. As I type this I can’t picture how it would be done.
The only laser I know of with curved surface engraving is the xTool P2 which is quite a bit more expensive than your expressed budget.
500 is plenty enough to get you started actually I found my own Walmarts web site 145. S9 w/air I was like what and it was delivered in 2.5 days . . Check it out .. if you really wanna spend more I have a friend over seas that hooked me up , w/ a company that has all the goods. Don’t know much about the company but they seem to be hi end and well built after I get a extra 5 6 hundred I’m getting a new one and will let y’all know or may be if you want and are interested I’ll set ya up w/ em let me know ..
..
It looks okay.
mrb bende s30 33w yüksetme kiti aldım fakat çalışmadı.anakart ışık yanmıyor.güç kaynagında elektrik var .