Author Archives: admin

xTool 1064nm Infrared Laser Review

xTool 1064nm Infrared Laser Review

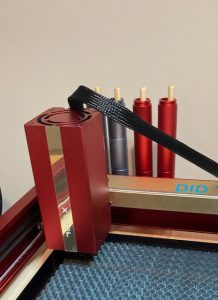
I was provided an xTool D1 Pro + RA2 Rotary kit to review for xTool.  I purchased the xTool Infrared Laser with my own funds.

So I have been using lasers for a few years now however the ability to engrave metals has eluded me.  One of these days I’ll probably pick up a proper fiber laser but I haven’t done it yet. Since I have an xTool D1 Pro 20 watt I decided to grab the xTool 1064nm Infrared Laser.

And as usual this blog will take you through the things that I have discovered while using it and not the typical unboxing video or walking you through the specifications..  The first thing that I discovered was that the box contained the xTool  laser module and a power brick, however the power brick didn’t contain the cable that goes from the outlet to the brick.

Continue reading

xTool D1 Pro Review

Leave a reply

xTool D1 Pro Review

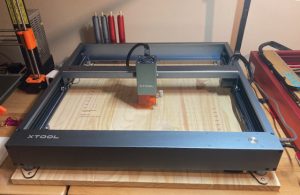
Full Disclosure – xTool provided me an xTool D1 Pro at no cost to review.  They in no way whatsoever influenced this xTool D1 PRO review.  

NOTE:  Almost all my testing is done with Lightburn using the configuration file xTool provides here.

It doesn’t take me long to tell whether something is great, good, or problematic.  In the case of the xTool D1 Pro review my conclusion is landing somewhere in GreatLand™.

I’d be remiss in not mentioning that I have considerable desktop and CO2 laser usage and I know just what to do to reveal problems right away.

While waiting for my D1 Pro to show up I began asking people questions and joining forums and groups.  The first thing that hopped off the page for me were people asking “How do you keep things straight?”

Continue reading

xTool D1 Pro First Impressions

xTool D1 Pro Build and First Impressions

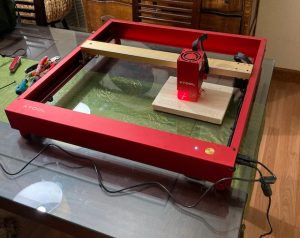
FULL DISCLOSURE – I was contacted by xTool and provided this xTool D1 Pro Kit to review.   This is just an initial impression following my build out,  with a further, more in-depth review to follow soon.

 XTool D1 Pro

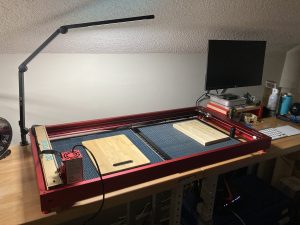
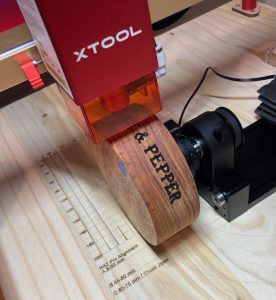
My laser is the 20 watt version with the RA2 Rotary.  It has an impressive working area size of 430 x 390 mm (16.93 x 15.35 inches).  The published Z height is 50 mm (2 inches).  I suppose they had to put some number there but the reality is you can laser an item of just about any height if you raise the laser with the included riser legs or 3D print legs or stack soup cans under the legs. The Z height can be just about anything.

Intro

As usual I won’t spend time with videos showing the unboxing or reposting things you can find on their product information page.  If you are looking at this blog and have an interest in getting an xTool D1 Pro you’ve already looked at their page and me re-hashing a picture of the box and listing the specifications (other than the ones I listed just above)  is simply redundant and a waste of your time.   Here on my blog I get something, use it, sometimes in ways it wasn’t meant to be used, and then tell you what I think.

Continue reading

Ortur Laser Master 3 LE Review

Ortur Laser Master 3 LE Review

Ortur Laser Master 3 LE Review

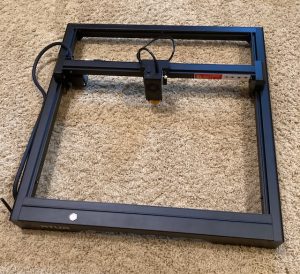
I’ve been doing desktop diode lasers since they became mainstream in about 2019.  Prior to that they were mostly DIY.  Ortur was pretty much first to the game with the Laser Master 1 and subsequently the Laser Master 2.  I owned 2 of those.   I’ve since picked up a Laser Master 3, an Aufero 2 and now it is time to do an Ortur Laser Master 3 LE Review.

I wasn’t really a fan of the Ortur Laser Master 3 and I wrote at length about that here.  My LM3 works fine but I generally think the design has some issues. It sits so low as to be almost unusable for anything over 400mm in width unless you raise the machine. Also  there are support issues regarding the lens protective glass that just aren’t right.

Unboxing And Assembly Video

HA!  I don’t do that here.  Ortur lists what’s in the box on the product webpage and they have a great assembly video.  Why people think showing what’s in the box is useful in a video when those components are listed in a chart, I’ll never know.

Continue reading

Ortur Laser Master 3 Review 

Ortur Laser Master 3 Review

First Impressions

I’m a little late to the show on this one and the Ortur Laser Master 3 has been reviewed to death on the internet.  It was released around mid-July 2022 so it took me around 5 months before I got my hands on one.

I previously owned two Ortur Laser Master 2’s and I considered the LM2 to be the first real viable, non-DIY desktop laser out there.  I sold one of them about a month ago, and the other just a few days ago and took the proceeds from those sales and picked me up a Black Friday priced special.

Now I currently own an OMTech 50 watt CO2 laser and an xTool D1 Pro so the Ortur Laser Master 3 has some stiff competition.  This blog will be strictly my first impressions and not an overall review of the machine.

First of all, while it was in the mail I watched all the assembly videos and read all the blogs and tried to get up to speed as much as possible.  The Ortur Laser Master 3 has perhaps the easiest build of any desktop laser I’ve ever owned.   However, there was one catch and that catch left me FUMING.

Read on.

Continue reading

Ortur vs xTool

Ortur vs xTool

INTRODUCTION

Side hustle is a thing!  One of the best side hustles going is laser engraving.  In the world of desktop laser machines there are several purchase options out there but most users ultimately pare their selection down to Ortur vs xTool.

I own both an Ortur Laser Master 3 and an xTool D1 Pro.  In the interest of full disclosure, xTool provided me a D1 Pro 20 watt kit to review, however in this article I’ll be mostly comparing the Ortur offering vs an xTool D1 Pro 10 watt, which I purchased with my own funds.  Also in the interest of full disclosure I previously owned two Ortur Laser Master 2 machines.

Let the games begin!

Continue reading

USING MULTIPLE xTOOL LASERS WITH LIGHTBURN ON MAC

Multiple xTool Lasers with Lightburn on a Mac

I have two xTool D1 Pro lasers and I thought it would be easy to hook the xtool’s to Lightburn on one computer. It wasn’t.  While the solution is easy, the steps must be done in a specific order to make this work.

Using the xTool software, xTool Creative Space works perfectly.  This is a Lightburn / Mac / USB issue.

Fortunately there is a way to make this work.

When I first started this I had the red D1 Pro 20 watt with the extended bed hooked up.  It worked perfectly.  Then I bought an xTool D1 Pro 10 watt and hooked it to the same computer.

This is when the trouble began.

Continue reading

Best Budget Laser Engraver

Best Budget Laser Engraver

I own two of the very best laser engravers that money can buy.  The xTool D1 Pro (20 watt and 10 watt).  But they cost a buck or two. In fact, an entry level laser from just about anywhere is in the $500 and up range. What if you just want to get your feet wet in the laser world as cheaply as possible?  Or maybe you want an inexpensive back up machine.  Let’s find the best budget laser engraver to get you started.

And right away I need to make it clear that I’m not saying that this is the best laser engraver by a long shot.  It is my choice for the best BUDGET laser engraver.  

To get the optimum bang for your buck you need to leave the country and head to AliExpress to find the best budget laser engraver.  You simply are not going go get a similar deal from the US based sales or places such as Amazon.  Of course you can always check the classifieds for a used laser but you don’t really know what you are getting there.

If you search for “laser engraver”, you’ll find some good ones that hover around the $200 price point.  However, beware potential shipping costs and make sure you are getting a laser with about a 5 watt optical output.  Most anything else is a toy.  Also check for coupon availability.

There are several no name lasers on there that price out at some ridiculous prices around $120 but once you click on them you’ll find that price is actually an extension kit or just the laser head.  Clicking on the box for the full laser that is 5 watts or so pushes you up around $200 again.

Read on to see what I determined the best deal was.

Continue reading

HOME LASER ENGRAVING BUSINESS

HOME LASER ENGRAVING BUSINESS

This blog is about using your laser for your home laser engraving business and staying operational.  If you want a hobby machine and don’t care about business buy an xTool D1 Pro kit.  Period.  End of story.  You’ll thank me.   If you want to be in business to make money and satisfy customers………….read on!  Actually I still recommend the xTool offerings for  a home laser engraving business too.  But I do discuss other options. 

home laser engraving business

If you read this blog at all you know that one of the things that I have witnessed over and over again in my time with laser machines is what happens when they break.  It does not matter:

  • Who the manufacturer of the laser machine is.
  • What type of laser (CO2, Diode) it is.
  • What happened to break the laser.

You will see a frantic call for help that goes something like this:  “My laser just broke and I have orders to fulfill and I am screwed.”

Then there will be a tirade about the company and their quality.  Forget the fact that they ran an open flame for 10 minutes under a 1mm thick piece of optical glass with the alarms silenced (or something like that).

The REAL PROBLEM is not that your machine is broken, the REAL PROBLEM is that you were operating a business with no plan to prevent downtime.  This blog will try to take a look at some of the real costs involved in staying operational.

Continue reading

Wiring Laser Air Assist KT332N Controller

Wiring a 24 volt Laser Air Assist Solenoid to KT332N Laser Controller

Adding an external, more powerful laser air assist is a MUST DO upgrade for your CO2 laser.  There are many guides on how to do this however none of them are specific to a laser which has a Ryxon KT332N Controller.  Larger lasers use different controllers and the controller connections have a different name on them on the KT332N which may confuse some users.

I’m not doing an inclusive build of materials here. This will just cover wiring the solenoid to the controller.

You will require a 24 volt Solenoid, normally closed. Let’s look at the parts required:

Continue reading